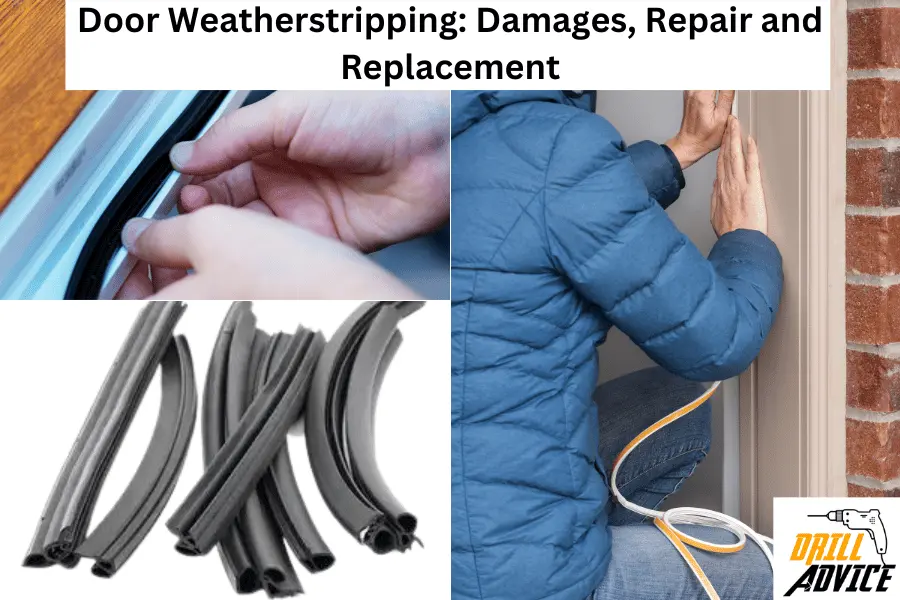
Door weatherstripping is a process of sealing the gaps around a door to protect it from external elements such as water, wind, and dust. This sealing process insulates the home. Door weatherstrippings are mainly 5 types. Those are foam weatherstripping, door sweep, V shape, door gasket, and door shoe weatherstrippings. They are strategically installed at the base, top, and sides of the door to create a barrier that prevents water and other elements from entering the home.
You should replace or apply the weatherstripping when you see visual wear and tear on the weather stripping, it is difficult to close or open the door, increasing electricity bills, pest infestations and water leaks due to weatherstripping. You can install the door weatherstripping using the below step-by-step guide with using below mentioned suitable tools and equipment.
You should protect the door weatherstripping from these damages such as Frequent usage, exposure to extreme weather, use of harsh cleaning agents, improper installations, physical damages, and pest activities.
What are the 5 Types of Door Weatherstripping and Their Usage?

Door weatherstripping is installed on all types of doors to protect from water, moisture and other enviromental substances. The most popular 5 types of door weatherstrippings are foam weatherstripping, door sweep, V strip or tension seal, door gasket and door shoe weather stripping. You can use one of these types according to your space between the door and frame, budget, installation difficulty and efficiency.
1. Foam Weatherstripping
Foam type weatherstripping comes in rolls of varying thickness and widths. It has an adhesive backing that sticks to surfaces directly. Adhesive-backed foam tape weatherstripping can be used for sealing gaps around doors and windows.
2. Door Sweep Weatherstripping:
Door sweep weatherstripping are flat pieces made of wooden, plastic, aluminum or stainless steel fitted with a strip of nylon, plastic, vinyl or a sponge brush. It is useful to seal the gaps between the door and the threshold to prevent drafts, dust and water from entering.
3. V-strip or Tension Seal Weatherstripping
This is a durable plastic or metal strip folded into ‘V’ shape that springs open to bridge gaps. It has tension- creating design. Therefore it is an effective seal type to prevent air leakage.
4. Door Gaskets:
Door gaskets are similar to door sweeps but usually made of rubber or silicon material. Door gaskets are used to create an airtight seal around, particularly the perimeter of in-entry doors. This is suitable for sealing around irregular gaps. This can use for extreme weather conditions.
5. Door Shoes Weatherstripping
This is a type of bottom weather-stripping designed to seal the gap between the bottom of the door and the threshold. They can be used to smooth the operation of the door by reducing friction.
When to Replace Door Weatherstrippings?
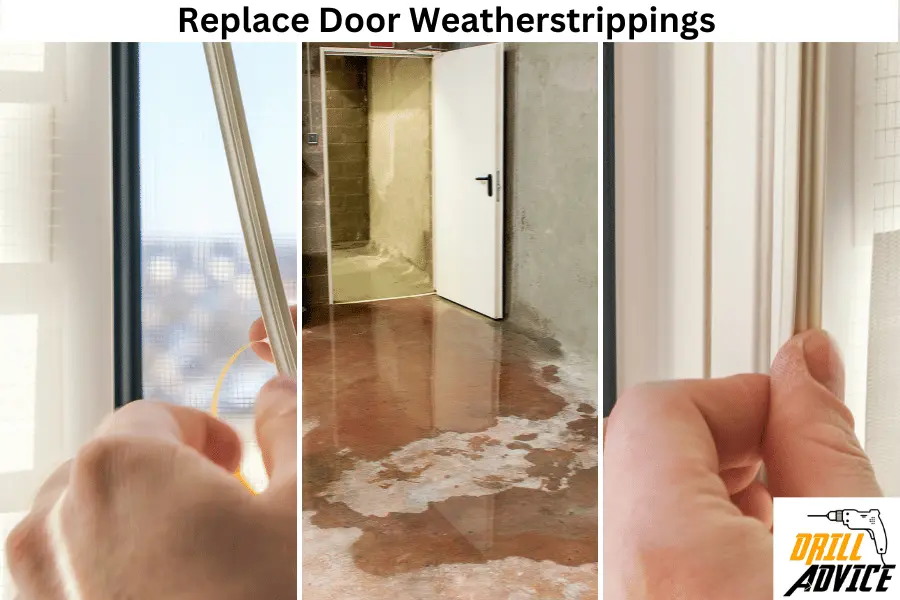
You should replace the door stripping when you see wear and tear on the weatherstripping, difficult to close the door, increasing the electricity bill, pest infestation and water leaks due to weatherstripping.
- Visual Wear and Tear on the Weatherstripping: You should replace the weatherstripping when you see signs of damage such as cracks, fraying, or gaps in the weatherstripping material.
- Difficulty in Closing the Door Due to Weatherstripping: You should change the weatherstripping when you are facing trouble while closing the door. The reasons might be due to deteriorated or swollen weatherstripping.
- Increased Utility Bills: If the amount of heating or cooling bills were increased, it can be a sign of compromised insulation due to ineffective weatherstripping. Ineffective weatherstripping cannot control the airflow inside the property, so the amount of heating or cooling bills were increased.
- Pest Infestations: You should install a new weatherstripping if you notice an increase in pests inside your home. Because the gaps in the weatherstripping allow easy access to pests.
- Water Leaks Due to Weatherstripping: If water is seeping in around the door during rain. The weatherstripping should be changed.
How to Install Door Weatherstripping?
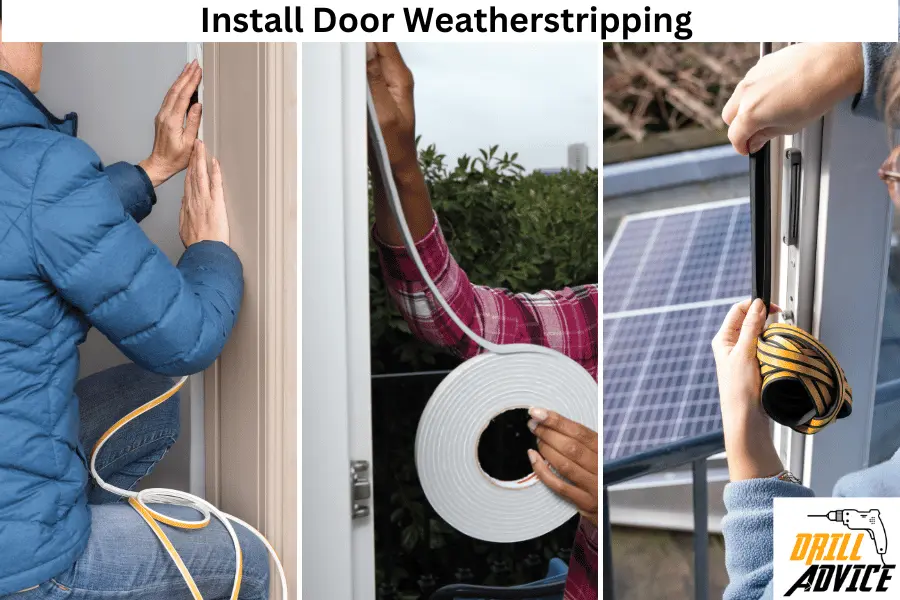
You can install the door weatherstripping using the tools and equipment. You should follow the below step-by-step process guide for the success installations.
Tools for Door Weatherstripping Installations
- Measuring tape
- Utility knife or scissors
- Screwdriver (for certain types of weatherstripping)
- Hammer (for certain types of weatherstripping)
- Weatherstripping material (e.g., adhesive-backed foam tape, door sweeps, V-strip or tension seal)
Steps for Door Stripping Installations
Step – 1 – Choose the Right Weatherstripping Material
Depending on the type of door and- the gap size, select a suitable weatherstripping material like adhesive-backed foam tape for smaller gaps or door sweeps for larger gaps at the bottom of the door.
Step – 2 – Measure the Door
Using the measuring tape, measure the length and width of the door frame where the weatherstripping need to be applied.
Step – 3 – Clean the Surface
Before you start with the installation, ensure that the door frame is clean and dry to allow good adherence of the weatherstripping material.
Step – 4 – Cut the Weatherstripping
Using the utility knife or scissors, cut the weatherstripping material to the measured lengths.
Step – 5 – Apply the Weatherstripping
- For Adhesive-backed Foam Tape:
- Peel off the backing of the tape.
- Firmly press the sticky side onto the door frame, starting at one end and slowly working your way to the other end to avoid any wrinkles or bubbles.
- For Door Sweeps:
- Position the door sweep at the bottom of the door.
- Using a screwdriver, secure the door sweep with screws at the pre-drilled holes.
- For V-strip or Tension Seal:
- Open the V-strip and press it against the frame or door edge where it will provide a seal.
- If it’s a nail-on type, use a hammer to secure it with nails.
Step – 6 – Check the Installation
Close the door to make sure the weatherstripping forms a good seal without hindering the door operation.
Step – 7 – Adjust if Necessary
If gaps are still visible, adjust the weatherstripping as necessary to ensure a snug fit.
Step – 8 – Inspect Regularly
Once installed, remember to inspect the weatherstripping periodically and replace it when signs of wear and tear are evident.
How to Damage Door Weatherstripping?
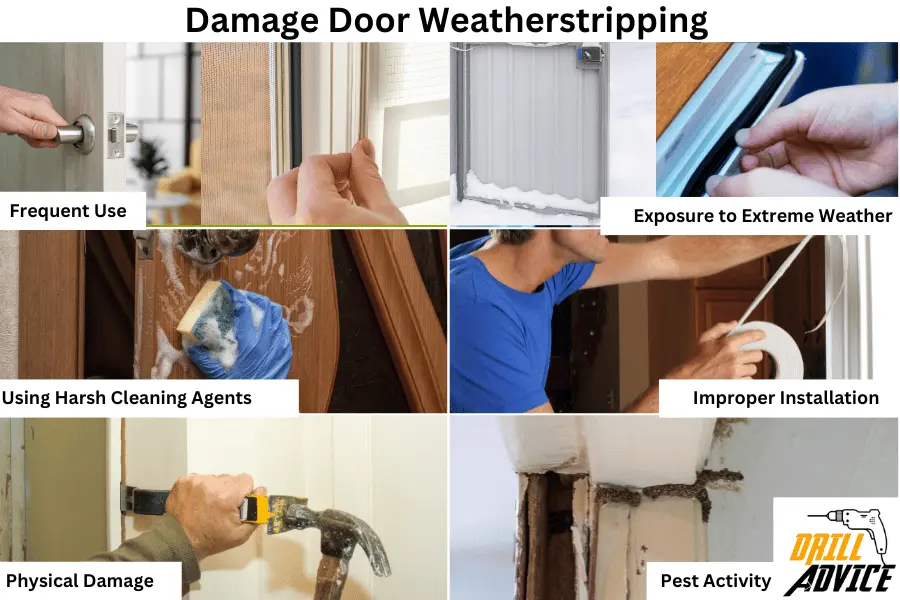
The door weatherstripping can be damaged due to these 6 common reasons such as frequent usage, exposure to extreme weather, use of harsh cleaning agents, improper installation, physical damages, and pest activities. You should maintain the door weatherstripping properly by avoiding these damages to protect well from hazards.
- Frequent Use: The door is frequently used to open and close. Hence, weatherstripping can be damaged easily due to wear and tear due to material fatigue and deterioration.
- Exposure to Extreme Weather: Extreme weather conditions may cause to change the structure of the weatherstrippings. High temperatures, heavy rainfall, or freezing conditions can adversely affect the lifespan of weatherstripping material.
- Using Harsh Cleaning Agents: The harsh chemicals or cleaning agents will affect the weatherstrippings by affecting the material.
- Improper Installation: Incorrect installation of weatherstripping can lead to premature damage.
- Physical Damage: Hitting the door frame with heavy objects or furniture can cause physical damage to the weatherstripping.
- Pest Activity: Weatherstripping is made of materials that can be damaged by rodents and pests.