A Hammer drill is a great tool for hard drilling purposes. Hammer drill has a special mechanism to drill hard materials such as concrete, stone, and bricks. It is essential to know how does a hammer drill work? Because it can help you to fix any problem DIY any time.
A hammer drill works as a combined function of drilling and hammering actions. The chuck can move forward and backward with the drill bit when it rotates. As a result of this drill bit tip can crush the forward material easily and remove out through drill bit flutes.
Using a hammer drill will need a proper user experience. It is not like impact drivers. You have to support that with your hands. The mechanism and usage are different with considering the hammer drill. Troubleshooting is also the same as that. So keep reading on for more information about the hammer drills.
What is Hammer Drill Mechanism?
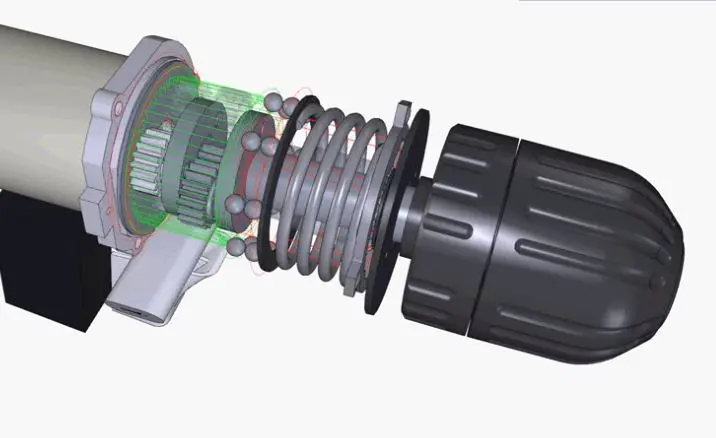
There are types of hammer mechanisms. A simple hammering mechanism is a clutch-based hammer mechanism. Beyond that, there is a piston-based moving mechanism in the rotary hammer drill and SDS hammer drill. Those are used for heavy-duty jobs.
The hammering mechanism is along with the tool. Therefore it can move forward and backward while drilling. Modern hammer drills are with a gearbox. It can share the power as the user requests. There are speed changing, torque changing, etc.
What is Blows Per Minute?
The hammering speed is called blows per minute (BPM). That means how much hammering action occurs per minute. When the bpm is high, the hammering action is high. It can drill efficiently.
What are the Types of Hammer Drills According to the Hammer Drill Mechanism?
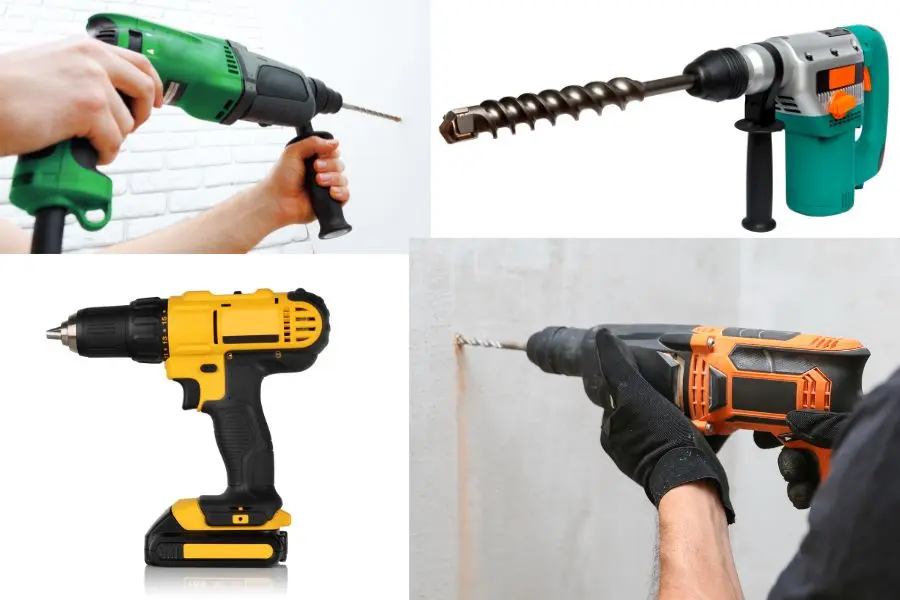
There are types of hammer drills. According to the usage and hammering action, there are types. A standard hammer drill, rotary hammer drill, and SDS hammer drill are those. Standard hammer drills are used for light work such as brick drilling etc. SDS and Rotary hammer drills are used for heavy-duty work, including chiseling also.
SDS hammer drill – SDS means Slotted drive shaft is used for heavy-duty work such as concrete or stone drilling. And also chisel can be used with this.
Rotary Hammer drill – There is a piston-based hammering mechanism. Extremely used for heavy-duty work.
Considering the Drill bits, there is a huge difference. Drill bits that are used for the soft material
When considering the hammer drill, there is so much troubleshooting. So let’s see what the troubleshooting is and how we can fix those.
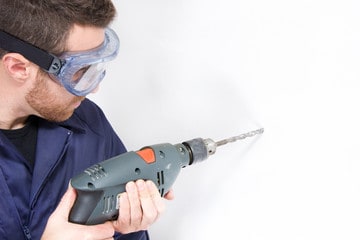
How to Use a Hammer Drill?
Using a hammer drill is more careful than a regular drill. Hammer drills are more powerful. So let’s see how this is used properly.
- Power up the Tool – Mount the fully charged battery or plug it into the current and then lock the trigger in the center position. For the best safety, you should remove the battery before you mount the drill bit.
- Select the Drill Bit – You should choose hammer drill bit according to the purpose. For concrete drilling you can use SDS Plus and SDS Max drill bit. If you need to demolition purpose you can use a chisel bit in the SDS hammer drill.
- Mount into the Chuck – Mount the drill bit to the chuck and then set the rotational side. Clockwise or anticlockwise.
- Hold the correct Position – When you use a hammer drill, you need to apply some pressure until the hammering action is activated. So you can’t handle it with a single handle. You will need to use both hands.
- Start Drilling – After you finish all steps, you can use proper speed and proper torque for the drilling process. For concrete, metal uses low speed, and for wood, you can use high speed.
After you push it a bit, you can start drilling at the beginning, start slowly, and when the depth is increased, it gradual. High-speed drilling will move the tool here and there. Then push until you feel the hammering actions to the hand.
Why Does My Hammer Drill Not Turn On?
If the hammer drill does not turn on, there is a power problem. Check the motor brushes first, and then check the battery charging, voltage, power cord, holder, and armature. If one of these has a damaged hammer drill will not work properly. If you can see the problem, you can fix it. Else connect the service center for warranty.
Why is My Hammer Drill too Slow?
Hammer drill mode is too slow due to the motor or inner mechanism failure. If there is a problem with the carbon brush, it can be rotated slowly. You should check carbon brushes, bearings, armature and gears, “o” rings, pistons, and inner parts. You can fix them by using the user manual or using a service center.
How to Clean a Hammer Drill?
Clean dust and debris from the charger and ventilation area. Keep the handle free of oil or grease. Use mild soap and a damp cloth to clean the tool. Do not clean the battery pack with any liquid and do not use include gasoline, turpentine, lacquer thinner, paint thinner, chlorinated cleaning solvents, ammonia, and household detergents containing ammonia.
Is Combi Drill a Hammer Drill?
Yes, a combi drill can also function as a hammer drill. The term “combi drill” is used to denote a drill that serves a “combination” of functions of both impact mechanism and hammering action. This type of drill can perform standard drilling, screw-driving, and hammer action for drilling in hard materials such as masonry or concrete. It has an option to switch functions such as rotating, hammering, and impact action.