Drilling a hole in glass is a very interesting DIY project. Glasses are widely used for storage. But it can be used to beautify the environment also. So, you will need to drill or cut the glass for that. Glass is a brittle material. It can be cracked or broken, even small mistakes. So you have to pay attention to the drilling process. Let’s see how to do this properly.
You can use a hand drill as well as a bench drill as you wish. But the most important thing is applying a constant force. So follow the steps from the beginning for a better drilling process. I will mention everything in detail here.
1. Select the Drill and Drill bit for Glass Drilling
Before you drill the glass, you must decide which drill and bit you are going to use. There are so many types of drills and drill bits in the market.
Suitable Drill for Glass Drilling – It is better if you can select the bench drill. When using a bench drill, you can apply the constant force to the handle. That is not able to do with any type of hand drill. As well as if you use the drill, you should use the low speed. And when you use the hand drill, make sure any impact action or hammer actions are not activated.
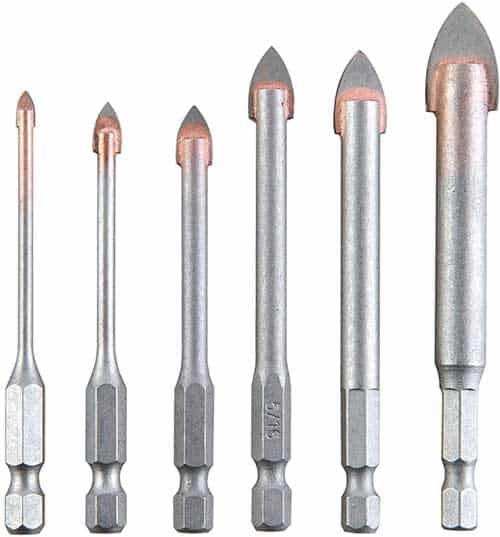
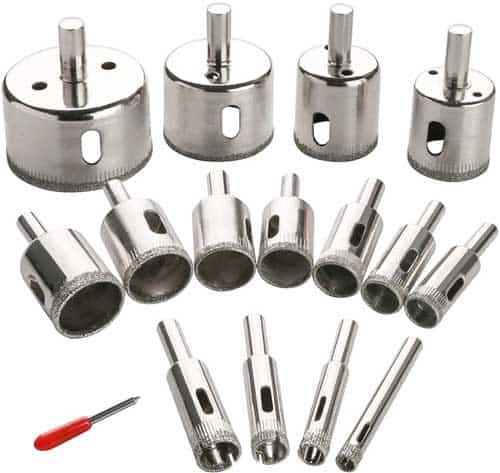
Suitable Drill Bit for Glass Drilling– There are regular drill bits, masonry drill bits(carbide bits), and diamond drill bits. So when you drill this, you can find these types of drill bits. Most probably, you are not able to use a regular drill bit. The masonry drill bit is able to use, and it takes two times the diamond drill bits. (2X)
So you had better use the diamond drill bit or hole saw
2. Stick a Tape on the Drilling Point on the Glass
Normally drilling point should be visible. So you can mark it on the sticky tape. When you are drilling the tiles, you may have some experience the drill bit can place on the exact drilling point. The reason is, it can slip here and there due to the smooth surface.
That is why we need to paste the tape on the drilling point and drill on the market point. When you paste a tape, you will not slip on the surface. So that is a nice trick. Try that for you.
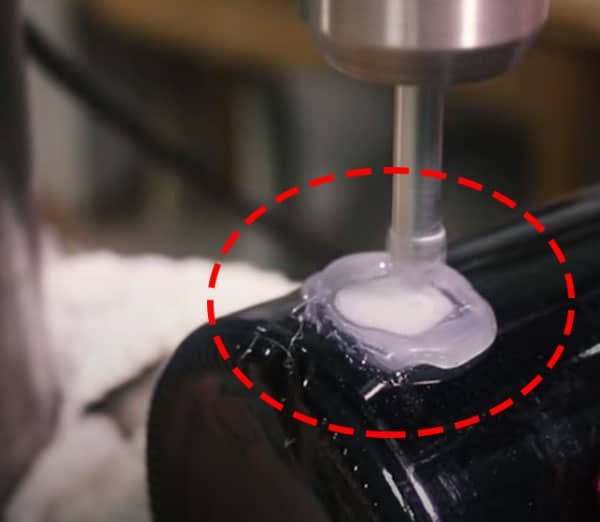
3. Make the Water Storage Using a Glue Gun on the Glass Surface
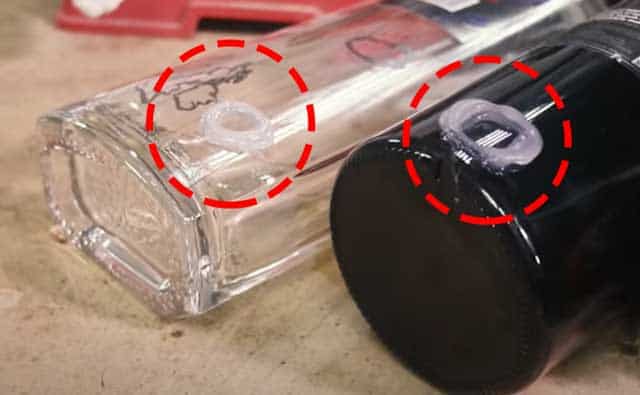
When you are drilling, you should drop the water to reduce the dust and temperature. Glass dust is extremely harmful, so water is essential for drilling. You will need to pour the water every time until you finish the drilling. So if you can make water storage using the glue gun, you will no need to pour water every time.
As well as you will need to change the water due to heating the drill bit as well as the glass. So water storage is a real solution for that.
4. Follow the Proper Glass Drilling Steps
When you start the drilling process, you must follow these steps.
- Start it slowly. Else it will crack and slip easily. (Use 400 RPM)
- Apply constant pressure to the drill bit.
- Release the pressure when it heats much.
- Do not turn or angle.
- Pour the water inside the drilling hole every time.
- Do not pressure too much.
- If you can drill both sides do it.
- Do not pressure much at the end. It will crack.
5. Clean The Drilled Glass Hole
If you used a drill bit, you might need to clean the hole. Glass is a sharpening material. So before you touch the drilled hole, wash it and then clean it more. Small glass particles may cause cutting of the fingers.
You can use sandpaper to clean the hole.
If you use a hole saw. you have to take out the cutting part inside.