An Impact wrench is with electrical and mechanical components. Mechanical components are moving with touching each other. There is a fraction in the moving parts. As a result of this, heating and noise occur. So it is essential to grease the impact wrench inside. So let’s see all steps you should know to grease the impact wrench.
When You Should Grease an Impact Wrench?
You should grease an impact wrench when you see one of the below situations such as bad noise from the impact wrench, a burning smell from the impact wrench, high heat generation and seeing dry black dust particles from the impact wrench.
- Hear Bad Noise from the Impact Wrench – When you hear bad noise from the tool, you can decide that you need to apply grease inside. Normally, it is like a scratching noise. When two types of metals are touching hard, you can hear it. If this kind of abnormal noise leads you to grease the impact wrench.
- Feel Buring Smell from the Impact Wrench – When you use an impact wrench, you can feel a burning smell. That will not feel you before. It is the smell that comes out from the tool due to no grease.
- Feel High Heat from the Impact Wrench – When you use an impact wrench, you can feel a lot of heat is generated while the tool is using. So you have to make sure whether the tool is overheated or not. Most heat is generated due to a lack of grease. So keep it cool and ready for the greasing.
- Dry Black Dust Particles Visible from the Impact Wrench – When you can see any black dust coming out, the inside is completely dry, and there is no drop of lubricants. So pay your attention to this.
How to Grease an Impact Wrench?
Follow the below 7 steps to grease the impact wrench properly
1. Check the Impact Wrench Warranty
This really important thing. Warranty is very useful when there is any problem with the tool. So most power tool companies provide extremely super warranty for the impact wrenches. So when you try to grease it, you have to separate the tool. So you have to cut the stickers and some parts which are kept for the warranty checking.
So in this situation, you should not separate it. First, check the user guide or warranty agreement. If there is no problem, you can follow the below steps.
But if you cannot find such information, call customer support. Ask them about the matter and check for the warranty. If they are okay, you can follow that. If there is no permission, ask them about the solution.
2. Separate Impact Wrench Parts
After you have cleared all permissions and have the recommended instructions, you can grease. After that, you can separate the parts.
First, have a screwdriver or impact driver of the proper size. Then unscrew all screws that need to separate the impact wrench. If you are not able to unscrew them use any rust removal. Sometimes those can be clogged due to rusting or dust. Hence there will be problems when you unscrew them.
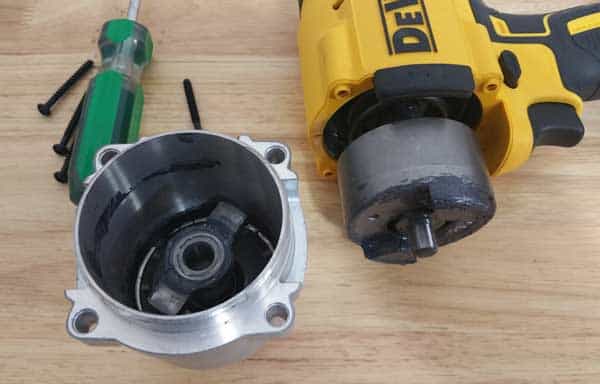
Some tools are available with easy separation. Those can remove out only the impact mechanism section from the tool. You can see this unit is fixed separately from the screws. In this situation, you do not need to separate all parts from the casing.
That depends on the model to model. So you had better know which parts should be unscrewed for the greasing.
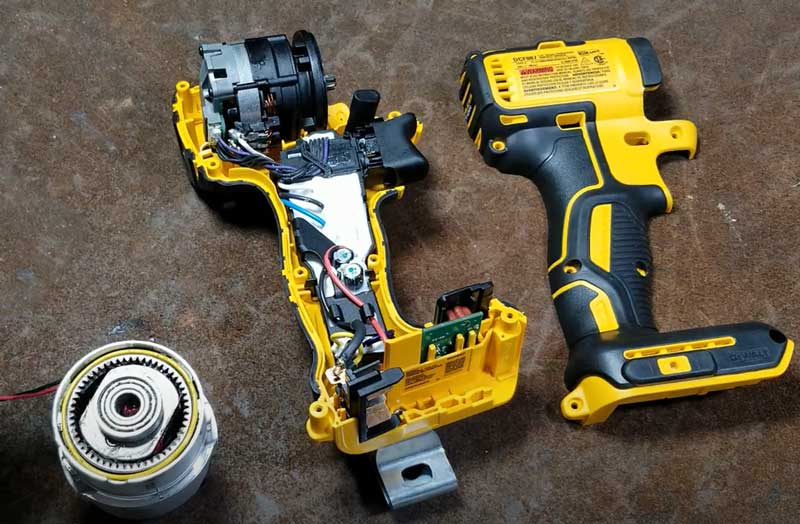
After all screws are removed then, cut the stickers if needed. Use the sharp cutting tool for this. After you have cut all, then open the casing as two main parts. Make sure not to cut or scratch any wire.
After the main separation, you can unplug the light wires. Which is close to trigger. Normally no need to remove any electrical parts. Have the removing guidance from the user manual. If there is any screw that fit the motor and impact mechanism components, unscrew them all.
3. Separate the Impact Wrench Mechanical Components
After you have done the main separation, you can see the motor combined with the impact mechanism component. So using a screwdriver, move up the motor and impact mechanism unit. then try to pull out the impact mechanism unit. Without having effort you can divide it into two.
So now we have the mechanical unit of the tool. This was a problematic area. So carefully separate all inside parts. Especially you can separate gear wheels. But do not separate the impact mechanism generator (hammer).
After that, clean the dust or any debris inside.
4. Apply Grease in the Impact Wrench
After you have finished all separation and cleanings, apply the recommended grease. Grease is used as a lubrication and heat-transferring medium. Hence, the selected grease should be thermally stable in the high-temperature range. So do not use high thicker grease. You can use general use grease with the small grease gun.
Try to use this kit: Ingersoll-Rand 105-LBK1 Impact Lube Kit
If you can, wipe the metallic surface with the greased cloth. It will prevent the corrosion effect.
5. Clean the Impact Wrench Motor
After you finish the grease application, then assemble it all together as it was. And check everything is alright. Then, connect it with the motor. Before that, clean the brushes and commutator of the motor.
Because its straight spacing can be filled with carbon particles. You can clear it and then check for the brush’s length. If the brushes are worn out, you have to replace them.
If you open only the front, you can clean the motor. So, don’t worry about these types of impact wrenches.
These kinds of problems occur for the brushed motors. if the tool is brushless, drop some oils on the bearings. It will be a long-lasting impact wrench. Then plug the wires if you unplug any.
6. Tight the Nuts
After the process is over then assemble the casing together and then tighten the screws. You can use the screwdriver or impact driver for this. Make sure no wire touches the edge of the casing. Do not tight all screws together. Step by step, tight the screws until the impact wrench completely tightens.
7. Check the Impact Wrench for Testing
Now you have done all.! What is next? So check whether it properly working. Make sure there is no above problem. So you can hear fresh noise and no smell, heat or anything. Finally, you have done it!
What If I do not Grease the Impact Wrench?
If you do not grease the impact wrench you can observe below 4 main characteristics of the impact wrench.
- Decrease the impact wrench efficiency – Lack of lubrication of the impact wrench decreases the tool’s efficiency and makes it harder to operate.
- Increase wear and tear in the impact wrench – The increased friction can also cause the parts of the wrench to wear out more quickly. This can lead to more frequent breakdowns and the need for more frequent replacements.
- Shorten the lifespan – The increased wear and tear can cause the tool to break down completely, requiring you to purchase a new one.
- Higher safety risks during using the impact wrench – A poorly maintained impact wrench can also pose safety risks.
- Overheat the impact wrench – Impact wrench can overheat while it is using if you do not grease is properly